Short answer
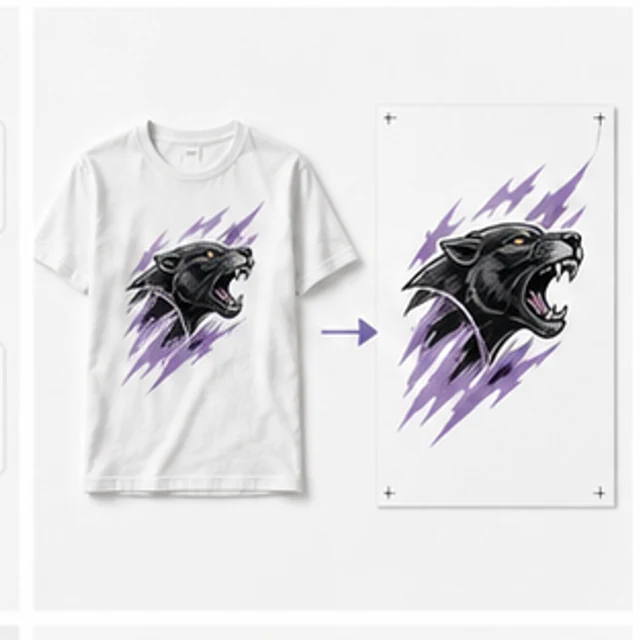
To extract print-ready artwork from a mockup, start with the clearest authorized product image, crop the exact artwork area, add alternate reference angles, and choose the extraction output that matches the job. In Ayzelify Print Lift, full-sublimation mode can reconstruct front, back, and sleeve artwork maps, while logo extraction can create a clean, deduplicated 4K logo sheet. Compare the PNG with the source, repair uncertain text or hidden details, vectorize when scalable paths are needed, and confirm size, color, print method, and factory requirements before production.
Why this matters
A mockup is visual evidence, not the original artwork or an automatically approved print file.
A tight source crop and up to four useful reference angles give the extraction workflow better evidence.
Full-sublimation reconstruction and logo extraction solve different production problems and need different review criteria.
Typography, logos, hidden panels, color, scale, and repeat behavior must be checked against the source instead of guessed.
Raster cleanup, vectorization, print separation, embroidery digitizing, and factory preparation are separate downstream stages.
The final handoff should preserve the source, extracted PNG, corrected master, production notes, ownership, and approval history.
Practical guide
Start with evidence, rights, and the final output role
Ask what the downstream team actually needs before extracting anything. A printer may need a transparent raster at an exact size, a screen-print operator may need separations, an embroidery team may need clean geometry for digitizing, and a sublimation designer may need artwork maps that can be placed inside graded pattern pieces. The same mockup cannot prove all of those deliverables. Label the target as a reference, review file, vector source, artwork map, or final printer-specific file so nobody mistakes an intermediate output for approval.
Use only artwork the brand, buyer, or factory is authorized to reproduce. Collect the original mockup, the highest-resolution product photo, closeups, back and sleeve views, official logo files, color references, and any existing production notes. Mark which regions are visible and which are missing. A low-resolution screenshot can still communicate intent, but it cannot confirm tiny lettering, exact curves, hidden graphics, physical scale, or production color by itself.
Crop the print area and add useful reference angles
Ayzelify Print Lift accepts PNG, JPG, and WebP files by upload, drag-and-drop, or paste. The in-app crop step lets the user frame the exact printed region before generation. Crop tightly enough to reduce unrelated seams, background, model, or garment areas, but keep the complete artwork edge and enough context to understand orientation. A crop that removes the first letter, border, sleeve boundary, or gradient transition asks the recovery model to solve a problem the source no longer shows.
Add up to four alternate references when they contribute evidence. A straight-on view helps dewarp geometry; a closeup helps with wording and negative space; a back or sleeve view supports its own artwork; and an original logo confirms details that a photograph cannot. Do not add near-duplicate blurry views merely to fill every slot. In the quality and instructions panel, name critical text, sponsor marks, panel order, colors, and any unknown area that must stay conservative rather than being invented.
Choose full-sublimation maps or logo extraction
The current Print Lift interface separates two visible recovery jobs. Full sublimation reconstructs one portrait PNG with four tall rectangular artwork maps arranged as front, back, wearer-left sleeve, and wearer-right sleeve. It removes the garment silhouette, seams, folds, lighting, fabric shine, and perspective while preserving supported color fields, gradients, motifs, logos, lettering, and relative placement. When the back is not supplied, the workflow should continue the print language conservatively without copying a localized front motif or inventing a name, number, or logo.
Extract all garment logos solves a different problem. It finds unique supported badges, patches, wordmarks, emblems, and printed marks; removes garment perspective and fabric effects; restores natural reading orientation; and deduplicates repeated placements into one 4096 by 4096 PNG on white. Use this mode when the real need is a traceable logo master sheet. It should not guess unreadable wording or preserve a rectangular patch as a photographed trapezoid.
Review uncertainty instead of hiding it
Place the extracted PNG beside the source and inspect at detail zoom. Check every word and number character by character. Review symbol construction, aspect ratio, borders, internal spacing, negative space, color relationships, gradients, motif scale, panel order, and edge continuation. Look for garment artifacts such as necklines, seams, cuffs, fabric texture, shadows, wrinkles, perspective, or cropped map edges. A visually polished result can still be wrong in the exact details that make a brand mark or print reproducible.
Classify uncertain regions rather than quietly approving them. If a logo is too small, reserve its location and request the official file. If the back is absent, flag it as an inferred continuation. If a number or sponsor line is unclear, rebuild it from buyer-confirmed text. If the garment uses an all-over visual language, continuation may be reasonable; if it uses one localized chest graphic, do not copy that graphic onto hidden panels. This review boundary protects designers and factories from turning an attractive guess into an expensive sample error.
Move from raster recovery to vector and print preparation
A clean extracted PNG may be enough for an approval reference or a raster print process when its real dimensions and resolution satisfy the production partner. Logos, typography, line art, embroidery shapes, vinyl cuts, spot-color separations, and graphics that must scale usually need vector paths or manual redraw. Adobe's current Illustrator guidance describes Image Trace as a way to convert raster images into editable vector graphics and provides presets and controls for the trace, but automatic paths still require inspection.
After tracing, check for excessive nodes, broken corners, filled counters, altered letterforms, merged shapes, open paths, extra colors, and lost transparency. Rebuild type from an approved font or outlined master when possible. Then prepare the method-specific file: dimensions and placement, color mode or spot colors, bleed, repeat scale, underbase, minimum line weight, transparency, embroidery limitations, or panel clipping. Print Lift recovers visual direction; the production specialist turns that reviewed direction into the file the machine and material require.
Build a traceable factory handoff
Package the original mockup, selected crop, reference angles, extracted PNG, corrected raster or vector master, physical size, placement coordinates, color specification, print method, material or garment color, version number, and named approval. For full-sublimation maps, state clearly that the rectangles are artwork carriers to be transformed and clipped into the factory's real graded pieces. They are not sewing patterns and do not prove seam allowances, grading, measurements, or marker geometry.
Run a sample or production proof when exact placement, repeat joins, color, ink behavior, embroidery detail, or panel continuity matters. Photograph and record the approved result so the next order starts from stronger evidence. If the artwork will also appear on a website, Google recommends sharp images, relevant surrounding text, descriptive filenames, and useful alt text rather than keyword stuffing. That helps the public guide explain the workflow, while the private handoff retains the source and approvals needed to manufacture responsibly.
Common questions
Can a mockup be converted directly into a print-ready file?
A mockup can be converted into a cleaner artwork reference, but the result is not automatically approved for production. Text, logos, hidden areas, scale, color, resolution, transparency, repeat behavior, print method, rights, and factory requirements still need review and often correction.
What does Ayzelify Print Lift extract from a garment mockup?
The current workflow can reconstruct a full-sublimation set as four flat artwork maps for the front, back, left sleeve, and right sleeve, or extract unique garment logos into one dewarped, deduplicated 4K raster sheet for review and vector tracing.
How many reference images can I add to Print Lift?
You can use one primary product image and add up to four reference angles. Add only views that reveal useful evidence such as the back, sleeves, close typography, badges, or artwork hidden by the main perspective.
When should extracted artwork be vectorized?
Vectorize or redraw artwork when logos, typography, badges, line art, embroidery shapes, vinyl cuts, separations, or large-format graphics need scalable editable paths. Photographic textures, gradients, and some sublimation artwork may remain raster when the production partner approves the resolution and dimensions.